

PetPivot AutoScooper Fehlerbehebung: Blockiert, führt keinen Zyklus aus oder zeigt eine Warnmeldung an

Über den Autor
Kurze Antwort: Stoppen Sie den Zyklus, halten Sie die Katze vom Gerät fern und identifizieren Sie das exakte AutoScooper-Modell, bevor Sie Änderungen vornehmen. Prüfen Sie anschließend in dieser Reihenfolge: Stromversorgung, Ausrichtung beim Start, Standort, Sitz des Abfallbehälters, Position der Einlage, Füllstand der Streu, kompatible Streu und sichtbare Sensorbereiche. Erzwingen Sie keine Bewegungen der Trommel, umgehen Sie keine Sicherheitsreaktion und öffnen Sie nicht die elektrische Basis. Wenn das Gerät nach den im aktuellen Handbuch empfohlenen Prüfungen nicht zum Normalbetrieb zurückkehrt, notieren Sie den Status der Anzeige und kontaktieren Sie den PetPivot-Support. Dieser Leitfaden bietet eine sichere Vorgehensweise zur Fehlerdiagnose. Er ersetzt nicht das mit Ihrem Modell gelieferte Handbuch. AutoScooper 11 und AutoScooper 12 Lite verwenden nicht notwendigerweise dieselben Bedienelemente, Anzeigen, Streuvorgaben oder Rücksetzschritte. Verwenden Sie eine automatische Katzentoilette nicht, wenn deren Trommel falsch ausgerichtet ist, eine Komponente beschädigt ist, ein Kabel nass oder beschädigt ist, das Gerät ein neues mahlendes Geräusch macht oder eine Sicherheitsreaktion nicht eindeutig ist. Symptom Erste sichere Prüfung Nicht tun Nächster Schritt Kein Strom oder keine Lichter Steckdose, Adapterverbindung und trockener Stecker Die elektrische Basis öffnen Eine nachweislich funktionierende Steckdose testen, dann den Support kontaktieren Kein Zyklus nach Einrichtung Ausrichtung beim Start abschließen lassen Während der Ausrichtung mehrere Tasten drücken Auf den normalen Standby-Zustand warten Rote oder ungewöhnliche Warnung Abfallbehälter, Einlage und sichtbare Sensorbereiche Einen universellen Fehlercode voraussetzen Das Handbuch des aktuellen Modells verwenden Zyklus pausiert Sicherstellen, dass die Katze und nahegelegene Bewegungen nicht in der Nähe sind Einen Sicherheitssensor deaktivieren oder abdecken Die dokumentierte Sicherheitsbedingung klären lassen Trommel scheint festzustecken Strom ausschalten und auf sichtbare Hindernisse prüfen Mit Gewalt drücken, ziehen oder drehen Die Position fotografieren und den Support kontaktieren Abfall wird nicht entfernt Streuart, Füllstand und Klumpqualität Mehr Streu über die MAX-Linie einfüllen Eine Variable korrigieren und einen manuellen Zyklus testen Schritt 1: Modell bestätigen und Beweise sichern Notieren Sie vor dem Ausstecken oder Bewegen des Geräts das Produktmodell, die Lichtfarbe und ob diese leuchtet oder blinkt. Zeichnen Sie auf, was das Gerät unmittelbar vor dem Problem getan hat. Ein 15- bis 30-sekündiges Video kann Geräusche, Trommelposition und Anzeigeverhalten genauer zeigen als eine schriftliche Beschreibung. Halten Sie fest: Modellname und Serieninformationen; Bestellnummer und Einkaufskanal; Anzeigefarbe und Blinkmuster; ob das Problem beim Starten, nach einem Besuch der Katze, nach dem Hinzufügen von Streu oder nach der Reinigung begann; Streuart und ungefähren Füllstand; Position des Abfallbehälters; ein kurzes Video aus sicherer Entfernung; kürzliche Verschüttungen, Standortwechsel, Stromunterbrechungen oder den Austausch von Teilen. Starten Sie das Gerät nicht wiederholt neu, bevor Sie den ursprünglichen Zustand aufgezeichnet haben. Intermittierende Probleme lassen sich leichter diagnostizieren, wenn der Support den ersten Zustand sehen kann. Schritt 2: Den Bereich sichern Halten Sie die Katze während der Inspektion in einem anderen Raum. Wenn die Trommel eine ungewöhnliche Position hat, das Gerät ein unbekanntes Geräusch macht oder eine Komponente blockiert zu sein scheint, stoppen Sie den Betrieb. Ziehen Sie den Netzstecker, bevor Sie das Gerät wie im aktuellen PetPivot-Leitfaden angegeben reinigen oder warten. Niemals: die Hand in eine sich bewegende Trommel stecken; einen Sensor manipulieren, abkleben oder abdecken; die Trommel mit Gewalt drehen; mit entferntem Abfallbehälter betreiben, es sei denn, das Handbuch weist ausdrücklich darauf hin; die elektrische Basis, den Adapter oder den Steuerungsbereich waschen; ein beschädigtes Stromkabel verwenden; den Motor oder die interne Elektronik auseinanderbauen. Diese Maßnahmen können die Diagnose des ursprünglichen Fehlers erschweren und neue Gefahren schaffen. Schritt 3: Ausrichtung beim Start prüfen Für den AutoScooper 12 gibt der aktuelle PetPivot AutoScooper-Benutzerleitfaden an, dass sich die Trommel nach dem Einschalten etwa zwei Minuten lang ausrichtet, und weist den Benutzer an, keine Tasten zu drücken, bis das Gerät den Auto-Modus erreicht hat. Wenn das Problem während der Einrichtung begann: Halten Sie die Katze vom Gerät fern. Stellen Sie sicher, dass das Gerät aufrecht auf einer ebenen, stabilen Fläche im Innenbereich steht. Stellen Sie sicher, dass der Abfallbehälter und die erforderlichen Teile gemäß dem Leitfaden installiert sind. Stellen Sie die Stromversorgung nur wieder her, wenn keine sichtbaren Schäden oder feuchten elektrischen Bereiche vorhanden sind. Lassen Sie den dokumentierten Ausrichtungszeitraum ohne zusätzliches Drücken von Tasten abschließen. Beobachten Sie, ob das Gerät seinen normalen Standby-Zustand erreicht. Wenden Sie diese Sequenz nicht auf ein anderes Modell an, es sei denn, dessen aktuelles Handbuch gibt dieselbe Anweisung. Beginnen Sie mit umkehrbaren Prüfungen und dem aktuellen Leitfaden; erzwingen Sie niemals eine festsitzende Trommel von Hand. Schritt 4: Strom und Aufstellungsort prüfen Ein loser Adapter, eine geschaltete Steckdose, eine Steckerleiste oder ein instabiler Boden können wie ein Produktfehler aussehen. Prüfen Sie zuerst die einfachsten externen Bedingungen. Drücken Sie die Adapterverbindung nur so hinein, wie es das Handbuch zeigt. Testen Sie die Wandsteckdose mit einem anderen kleinen Gerät. Vermeiden Sie Verlängerungskabel, die zu einer losen Verbindung oder Stolpergefahr führen. Stellen Sie das Gerät auf eine harte, flache und stabile Oberfläche in Innenräumen. Halten Sie das Stromkabel außerhalb der Route der Katze. Halten Sie Stecker und Hände trocken. Wenn Kabel, Stecker oder Adapter heiß, nass, zerkaut, rissig oder verfärbt sind, stellen Sie die Verwendung ein und kontaktieren Sie den Support. Reparieren Sie einen Netzadapter nicht mit Klebeband. Schritt 5: Abfallbehälter und Einlage inspizieren Für den AutoScooper 12 weist der aktuelle Leitfaden den Besitzer an, die Einlage unter dem Haltering anzubringen, sie nach unten zu drücken, um den Infrarotsensor freizugeben, und den Abfallbehälter in die untere Schiene zu schieben, bis er einrastet. Ein Problem mit dem Behälter oder der Einlage kann eine Warnung auslösen oder den normalen Betrieb verhindern. Bei ausgeschalteter Stromversorgung, sofern vom Leitfaden gefordert: entleeren Sie einen überfüllten Abfallbehälter; prüfen Sie, ob die Einlage nicht über einen sichtbaren Sensorbereich gefaltet ist; bestätigen Sie, dass der Haltering geschlossen ist; entfernen Sie loses Streu aus der Behälterschiene; installieren Sie den Behälter gleichmäßig neu, bis er die dokumentierte Sitzposition erreicht; stopfen Sie die Einlage nicht übermäßig voll und lassen Sie kein Material in bewegliche Bereiche ragen. Wenn nach der genehmigten Inspektion weiterhin ein rotes Licht leuchtet, gehen Sie nicht davon aus, dass der Behälter die einzige Ursache war. Der aktuelle AutoScooper 12-Leitfaden besagt, dass ein blinkendes oder dauerhaft rotes Licht entweder auf einen vollen Abfallbehälter oder einen ausgelösten Sicherheitssensor hinweisen kann. Schritt 6: Streuart und Füllstand prüfen Zu viel Streu kann die Last erhöhen oder in Bereiche gelangen, in die sie nicht gehört. Zu wenig Streu kann schwache Klumpen oder eine schlechte Trennung verursachen. Ein inkompatibles Material kann durch ein Sieb gelangen, zerbröckeln, verschmieren oder die Bewegung stören. Für den AutoScooper 12 spezifiziert die aktuell veröffentlichte Anleitung: kleinstückige klumpende Mineral- oder Bentonitstreu; Streu zwischen den MIN- und MAX-Linien; keine Tofu-Streu in langen Streifen; keine Kristallstreu; Verwendung der „Litter Added“-Funktion (Streu hinzugefügt) nach dem Hinzufügen von Streu, wie im Leitfaden beschrieben. Diese Anweisungen sind spezifisch für den AutoScooper 12. Verwenden Sie für den AutoScooper 11 das mit diesem Modell gelieferte Handbuch oder holen Sie die aktuellen Anweisungen beim Support ein. Kopieren Sie keine Streuregel von einem Modell auf das andere. Wenn das Problem nach dem Wechsel der Streu begann, kehren Sie erst zu einer bestätigten kompatiblen Art zurück, nachdem Sie das ungeeignete Material gemäß den Reinigungsanweisungen entfernt haben. Mischen Sie keine zufälligen Streusorten, um zu versuchen, den Mechanismus zu bewegen. Schritt 7: Sichtbare Sensor- und Bewegungsbereiche inspizieren Streustaub, ein Rand der Einlage oder ein loser Klumpen können einen sichtbaren Sensor- oder Bewegungsbereich beeinträchtigen. Verwenden Sie nur die Zugangs- und Reinigungsmethode, die vom aktuellen Leitfaden erlaubt ist. Sichere Inspektion bedeutet: die Stromversorgung ist bei Reinigung oder Wartung unterbrochen; die Katze ist vom Gerät entfernt; nur sichtbare, für den Besitzer zugängliche Bereiche werden inspiziert; loses trockenes Streu wird mit einer weichen Bürste oder einem trockenen Tuch entfernt; kein Sensor wird abgekratzt, besprüht, abgedeckt oder gedrückt; gewaschene abnehmbare Teile sind vor dem Wiederzusammenbau vollständig trocken. Wenn sich ein Hindernis in einem versiegelten oder elektrischen Bereich befindet, stoppen Sie. Dies ist ein Fall für den Support, keine Aufforderung, die Basis auseinanderzubauen. Symptom-Leitfaden Der AutoScooper hat Strom, startet aber keinen Reinigungszyklus Stellen Sie sicher, dass die Ausrichtung beim Start abgeschlossen ist, sich das Gerät im gewünschten Modus befindet und sich keine Katze oder kein sich bewegendes Objekt in der Nähe des Sensorbereichs befindet. Prüfen Sie Abfallbehälter, Einlage, Streufüllstand und sichtbare Sensorbereiche. Versuchen Sie dann nur den manuellen Zyklus, der für das Modell beschrieben ist. Wenn die Steuerung nicht reagiert, notieren Sie die Anzeige und kontaktieren Sie den Support. Wiederholtes Drücken von Tasten kann unklar machen, welcher Modus aktiv ist. Der Zyklus startet und pausiert dann Eine Pause kann eine normale Reaktion auf eine erkannte Anwesenheit oder Bewegung sein. Entfernen Sie Personen, Haustiere und bewegliche Objekte aus dem unmittelbaren Bereich und lassen Sie die dokumentierte Bedingung klären. Decken Sie den Sensor nicht ab, um das Fortsetzen des Zyklus zu erzwingen. Wenn der Zyklus in einem leeren Bereich pausiert, prüfen Sie auf einen Rand der Einlage, loses Streu oder ein sichtbares Hindernis. Eine wiederkehrende unerklärliche Pause sollte per Video dokumentiert werden. Die Trommel scheint festzustecken oder falsch ausgerichtet zu sein Drehen Sie sie nicht von Hand oder ziehen Sie nicht gegen den Motor. Schalten Sie das Gerät gemäß Leitfaden aus, halten Sie die Katze fern und prüfen Sie nur auf ein deutlich sichtbares loses Objekt in einem für den Besitzer zugänglichen Bereich. Fotografieren Sie die Trommelposition und kontaktieren Sie den Support vor einer weiteren Inbetriebnahme. Das Licht ist rot Im aktuellen AutoScooper 12-Webleitfaden bedeutet ein blinkendes oder dauerhaft rotes Licht, dass der Abfallbehälter voll ist oder ein Sicherheitssensor ausgelöst wurde. Inspizieren Sie den Behälter, die Einlage und die sichtbaren Sensorbereiche. Da der Leitfaden keine vollständige Tabelle der Blinkcodes veröffentlicht, nehmen Sie keine spezifischere Diagnose allein aufgrund der Farbe vor. Der Zyklus schließt ab, aber Abfall bleibt zurück Dies ist oft ein Trennungsproblem und kein Motorproblem. Prüfen Sie: kompatible Klumpstreu; Streufüllstand zwischen den Fülllinien; genügend Zeit zur Bildung eines festen Klumpens; klebrige Rückstände auf genehmigten waschbaren Teilen; zerbrochene Klumpen oder ungewöhnlich weichen Stuhl; die Abfallöffnung auf sichtbares loses Material. Kürzen Sie die dokumentierte Klumpzeit nicht und fügen Sie nicht zu viel Streu hinzu. Anhaltender weicher Stuhl, Durchfall oder eine neue Veränderung beim Ausscheidungsverhalten gehört zum Tierarzt, nicht zur Maschinenjustierung. Das Gerät wurde laut Stoppen und vergleichen Sie das Geräusch mit dem Normalbetrieb. Suchen Sie nach einem instabilen Boden, einem losen Außenteil, Streu in einer sichtbaren Schiene oder einem überfüllten Abfallbereich. Mahlen, wiederholter Aufprall oder ein neuer elektrischer Geruch erfordern den Support vor der weiteren Verwendung. Ein kontrollierter Test nach grundlegenden Prüfungen Führen Sie einen Test nur durch, wenn das Gerät korrekt zusammengebaut, trocken, frei von Hindernissen und die Katze sicher entfernt ist. Verwenden Sie einmal die im Handbuch dokumentierte manuelle Reinigung. Beobachten Sie von außerhalb des beweglichen Bereichs. Zeichnen Sie auf, ob: der Befehl angenommen wird; die Trommel in der erwarteten Richtung beginnt; eine Pause an der gleichen Position auftritt; sich eine Anzeige ändert; die Abfallöffnung sich leert; die Trommel in ihre normale Ausgangsposition zurückkehrt. Ein kontrollierter Test ist nützlicher als viele schnelle Neustarts. Wann man den PetPivot-Support kontaktieren sollte Kontaktieren Sie den Support, wenn die Trommel nicht in die normale Ausrichtung zurückkehren kann, eine Warnung nach den genehmigten Prüfungen bestehen bleibt, eine Sensorreaktion ungewiss ist, das Gerät neue mahlende oder aufprallende Geräusche von sich gibt, der Adapter beschädigt ist, Flüssigkeit in die elektrische Basis gelangt ist oder das Problem erneut auftritt. Verwenden Sie die PetPivot FAQ und kontaktieren Sie `support@petpivot.com`. Fügen Sie Modell, Bestellnummer, Anzeigestatus, kurzes Video, Streuart und die bereits durchgeführten Prüfungen bei. Versenden oder senden Sie keine benutzte Katzentoilette zurück, bevor Sie die aktuellen Rücksendeanweisungen erhalten haben. AutoScooper 11 AutoScooper 12 Lite Offizielle PetPivot Produktbilder. Bestätigen Sie die aktuelle Produktseite und den Modellleitfaden vor der Veröffentlichung. Fügen Sie modellspezifische Nachweise bei und verwenden Sie kein Gerät mehr, das physisch beschädigt oder unsicher erscheint. Wiederholte Unterbrechungen verhindern Halten Sie die Streu im dokumentierten Füllbereich. Verwenden Sie nur eine bestätigte kompatible Streu. Entleeren Sie den Abfallbehälter, bevor er überläuft. Halten Sie die Einlage unterhalb sichtbarer Sensorbereiche. Reinigen Sie genehmigte Teile planmäßig und trocknen Sie sie vollständig. Halten Sie das Gerät eben und den Servicebereich frei. Prüfen Sie den Zusammenbau nach jeder gründlichen Reinigung erneut. Speichern Sie das aktuelle Handbuch und den Support-Kontakt. Für modellspezifischen Betrieb kehren Sie zum PetPivot AutoScooper-Benutzerleitfaden zurück. Für Ersatzverbrauchsmaterialien und genehmigte Teile überprüfen Sie das PetPivot Zubehör. Häufig gestellte Fragen Warum startet mein AutoScooper keinen Zyklus, nachdem ich die Schublade geleert habe? Die Schublade mag leer sein, während das Gerät noch einen Sitz-, Einlagen-, Füllstand- oder Anwesenheitsstatus erkennt. Prüfen Sie nur vom Besitzer zugängliche Punkte in einer sicheren Reihenfolge. Halten Sie die Katze fern und stellen Sie sicher, dass das Gerät die Ausrichtung beim Start abgeschlossen hat. Setzen Sie die leere Schublade wieder ein und bringen Sie die Einlage genau wie im aktuellen Modellleitfaden beschrieben an. Prüfen Sie, ob die Streu kompatibel ist, eben liegt und im dokumentierten Füllbereich ist. Entfernen Sie Personen, Haustiere und bewegliche Objekte aus dem Sensorbereich und versuchen Sie dann nur den genehmigten manuellen Zyklus. Warum leuchtet das rote Licht noch, wenn der Abfallbehälter nicht voll ist? Auf dem aktuellen AutoScooper 12-Webleitfaden kann ein rotes Licht auch auf einen ausgelösten Sicherheitssensor hinweisen. Eine schlecht sitzende Schublade, eine Einlage, die einen Sensorbereich kreuzt, oder Bewegungen in der Nähe können daher von Bedeutung sein, selbst wenn noch Kapazität verfügbar ist. Was sollte ich tun, wenn Streu an der Trommel oder am Sieb festklebt? Schalten Sie das Gerät gemäß Leitfaden aus und entfernen Sie nur loses Material, das deutlich sichtbar und für den Besitzer zugänglich ist. Drehen Sie die Trommel nicht von Hand. Führen Sie keine Werkzeuge in geschützte Öffnungen ein. Tragen Sie keine Flüssigkeit auf die elektrische Basis oder geschützte Sensorbereiche auf. Fotografieren Sie wiederholtes Festkleben und kontaktieren Sie den Support, wenn normale Trockenreinigung dies nicht löst. Soll ich weiter auf Reset drücken oder eine festsitzende Trommel erzwingen? Nein. Wiederholte Befehle können die Sequenz verbergen, die den Fehler verursacht hat, und das Erzwingen der Trommel kann den Mechanismus beschädigen. Stoppen Sie nach den dokumentierten Prüfungen und bewahren Sie das Anzeigemuster für den Support auf. Welche Informationen sollte ich dem PetPivot-Support senden? Senden Sie genügend Beweise, damit das Problem reproduziert werden kann, ohne unsichere Tests zu wiederholen. Exaktes Modell, Bestellnummer und Serieninformationen, falls verfügbar. Anzeigefarbe und ob sie leuchtet, blinkt oder von einem Ton begleitet wird. Streuart, Füllstand und kürzliche Einrichtungs- oder Reinigungsänderungen. Ein kurzes Video, das die Position von Trommel, Schublade und Anzeige zeigt. Die sicheren Prüfungen, die bereits durchgeführt wurden, und was nach jeder einzelnen passiert ist. Internes Link-Verzeichnis Ankertext Ziel-URL Platzierung PetPivot automatische Katzentoiletten durchsuchen https://petpivot.com/collections/auto-scooper Kontextbezogene Produktfindung oder abschließender CTA AutoScooper 11 Produktdetails https://petpivot.com/products/litter-box Modellspezifischer Produktverweis AutoScooper 12 Lite Produktdetails https://petpivot.com/products/autoscooper-12-lite-cat-litter-box Modellspezifischer Produktverweis PetPivot AutoScooper Bedienungsanleitung https://petpivot.com/pages/user-guide Anweisungen zu Einrichtung, Betrieb, Reinigung und Sicherheit PetPivot FAQ https://petpivot.com/pages/faq Support- und allgemeine Fragen Quellen und Nachweise PetPivot AutoScooper Bedienungsanleitung - Aktuelle Einrichtung, Streu, Umgewöhnung, Wartung, Indikatoren und Betriebsgrenzen des AutoScooper 12. PetPivot AutoScooper 11 Produktseite - Offizielle Produktseite und originales Produktbild. PetPivot AutoScooper 12 Lite Produktseite - Offizielle Produktseite und originales Produktbild.
Kurze Antwort: Stoppen Sie den Zyklus, halten Sie die Katze vom Gerät fern und identifizieren Sie das exakte AutoScooper-Modell, bevor Sie Änderungen vornehmen. Prüfen Sie anschließend in dieser Reihenfolge: Stromversorgung, Ausrichtung beim Start, Standort, Sitz des Abfallbehälters, Position der Einlage, Füllstand der Streu, kompatible Streu und sichtbare Sensorbereiche. Erzwingen Sie keine Bewegungen der Trommel, umgehen Sie keine Sicherheitsreaktion und öffnen Sie nicht die elektrische Basis. Wenn das Gerät nach den im aktuellen Handbuch empfohlenen Prüfungen nicht zum Normalbetrieb zurückkehrt, notieren Sie den Status der Anzeige und kontaktieren Sie den PetPivot-Support.
Dieser Leitfaden bietet eine sichere Vorgehensweise zur Fehlerdiagnose. Er ersetzt nicht das mit Ihrem Modell gelieferte Handbuch. AutoScooper 11 und AutoScooper 12 Lite verwenden nicht notwendigerweise dieselben Bedienelemente, Anzeigen, Streuvorgaben oder Rücksetzschritte.
Verwenden Sie eine automatische Katzentoilette nicht, wenn deren Trommel falsch ausgerichtet ist, eine Komponente beschädigt ist, ein Kabel nass oder beschädigt ist, das Gerät ein neues mahlendes Geräusch macht oder eine Sicherheitsreaktion nicht eindeutig ist.
|
Symptom |
Erste sichere Prüfung |
Nicht tun |
Nächster Schritt |
|
Kein Strom oder keine Lichter |
Steckdose, Adapterverbindung und trockener Stecker |
Die elektrische Basis öffnen |
Eine nachweislich funktionierende Steckdose testen, dann den Support kontaktieren |
|
Kein Zyklus nach Einrichtung |
Ausrichtung beim Start abschließen lassen |
Während der Ausrichtung mehrere Tasten drücken |
Auf den normalen Standby-Zustand warten |
|
Rote oder ungewöhnliche Warnung |
Abfallbehälter, Einlage und sichtbare Sensorbereiche |
Einen universellen Fehlercode voraussetzen |
Das Handbuch des aktuellen Modells verwenden |
|
Zyklus pausiert |
Sicherstellen, dass die Katze und nahegelegene Bewegungen nicht in der Nähe sind |
Einen Sicherheitssensor deaktivieren oder abdecken |
Die dokumentierte Sicherheitsbedingung klären lassen |
|
Trommel scheint festzustecken |
Strom ausschalten und auf sichtbare Hindernisse prüfen |
Mit Gewalt drücken, ziehen oder drehen |
Die Position fotografieren und den Support kontaktieren |
|
Abfall wird nicht entfernt |
Streuart, Füllstand und Klumpqualität |
Mehr Streu über die MAX-Linie einfüllen |
Eine Variable korrigieren und einen manuellen Zyklus testen |
Schritt 1: Modell bestätigen und Beweise sichern
Notieren Sie vor dem Ausstecken oder Bewegen des Geräts das Produktmodell, die Lichtfarbe und ob diese leuchtet oder blinkt. Zeichnen Sie auf, was das Gerät unmittelbar vor dem Problem getan hat. Ein 15- bis 30-sekündiges Video kann Geräusche, Trommelposition und Anzeigeverhalten genauer zeigen als eine schriftliche Beschreibung.
Halten Sie fest:
- Modellname und Serieninformationen;
- Bestellnummer und Einkaufskanal;
- Anzeigefarbe und Blinkmuster;
- ob das Problem beim Starten, nach einem Besuch der Katze, nach dem Hinzufügen von Streu oder nach der Reinigung begann;
- Streuart und ungefähren Füllstand;
- Position des Abfallbehälters;
- ein kurzes Video aus sicherer Entfernung;
- kürzliche Verschüttungen, Standortwechsel, Stromunterbrechungen oder den Austausch von Teilen.
Starten Sie das Gerät nicht wiederholt neu, bevor Sie den ursprünglichen Zustand aufgezeichnet haben. Intermittierende Probleme lassen sich leichter diagnostizieren, wenn der Support den ersten Zustand sehen kann.
Schritt 2: Den Bereich sichern
Halten Sie die Katze während der Inspektion in einem anderen Raum. Wenn die Trommel eine ungewöhnliche Position hat, das Gerät ein unbekanntes Geräusch macht oder eine Komponente blockiert zu sein scheint, stoppen Sie den Betrieb. Ziehen Sie den Netzstecker, bevor Sie das Gerät wie im aktuellen PetPivot-Leitfaden angegeben reinigen oder warten.
Niemals:
- die Hand in eine sich bewegende Trommel stecken;
- einen Sensor manipulieren, abkleben oder abdecken;
- die Trommel mit Gewalt drehen;
- mit entferntem Abfallbehälter betreiben, es sei denn, das Handbuch weist ausdrücklich darauf hin;
- die elektrische Basis, den Adapter oder den Steuerungsbereich waschen;
- ein beschädigtes Stromkabel verwenden;
- den Motor oder die interne Elektronik auseinanderbauen.
Diese Maßnahmen können die Diagnose des ursprünglichen Fehlers erschweren und neue Gefahren schaffen.
Schritt 3: Ausrichtung beim Start prüfen
Für den AutoScooper 12 gibt der aktuelle PetPivot AutoScooper-Benutzerleitfaden an, dass sich die Trommel nach dem Einschalten etwa zwei Minuten lang ausrichtet, und weist den Benutzer an, keine Tasten zu drücken, bis das Gerät den Auto-Modus erreicht hat.
Wenn das Problem während der Einrichtung begann:
- Halten Sie die Katze vom Gerät fern.
- Stellen Sie sicher, dass das Gerät aufrecht auf einer ebenen, stabilen Fläche im Innenbereich steht.
- Stellen Sie sicher, dass der Abfallbehälter und die erforderlichen Teile gemäß dem Leitfaden installiert sind.
- Stellen Sie die Stromversorgung nur wieder her, wenn keine sichtbaren Schäden oder feuchten elektrischen Bereiche vorhanden sind.
- Lassen Sie den dokumentierten Ausrichtungszeitraum ohne zusätzliches Drücken von Tasten abschließen.
- Beobachten Sie, ob das Gerät seinen normalen Standby-Zustand erreicht.
Wenden Sie diese Sequenz nicht auf ein anderes Modell an, es sei denn, dessen aktuelles Handbuch gibt dieselbe Anweisung.

Beginnen Sie mit umkehrbaren Prüfungen und dem aktuellen Leitfaden; erzwingen Sie niemals eine festsitzende Trommel von Hand.
Schritt 4: Strom und Aufstellungsort prüfen
Ein loser Adapter, eine geschaltete Steckdose, eine Steckerleiste oder ein instabiler Boden können wie ein Produktfehler aussehen. Prüfen Sie zuerst die einfachsten externen Bedingungen.
- Drücken Sie die Adapterverbindung nur so hinein, wie es das Handbuch zeigt.
- Testen Sie die Wandsteckdose mit einem anderen kleinen Gerät.
- Vermeiden Sie Verlängerungskabel, die zu einer losen Verbindung oder Stolpergefahr führen.
- Stellen Sie das Gerät auf eine harte, flache und stabile Oberfläche in Innenräumen.
- Halten Sie das Stromkabel außerhalb der Route der Katze.
- Halten Sie Stecker und Hände trocken.
Wenn Kabel, Stecker oder Adapter heiß, nass, zerkaut, rissig oder verfärbt sind, stellen Sie die Verwendung ein und kontaktieren Sie den Support. Reparieren Sie einen Netzadapter nicht mit Klebeband.
Schritt 5: Abfallbehälter und Einlage inspizieren
Für den AutoScooper 12 weist der aktuelle Leitfaden den Besitzer an, die Einlage unter dem Haltering anzubringen, sie nach unten zu drücken, um den Infrarotsensor freizugeben, und den Abfallbehälter in die untere Schiene zu schieben, bis er einrastet.
Ein Problem mit dem Behälter oder der Einlage kann eine Warnung auslösen oder den normalen Betrieb verhindern. Bei ausgeschalteter Stromversorgung, sofern vom Leitfaden gefordert:
- entleeren Sie einen überfüllten Abfallbehälter;
- prüfen Sie, ob die Einlage nicht über einen sichtbaren Sensorbereich gefaltet ist;
- bestätigen Sie, dass der Haltering geschlossen ist;
- entfernen Sie loses Streu aus der Behälterschiene;
- installieren Sie den Behälter gleichmäßig neu, bis er die dokumentierte Sitzposition erreicht;
- stopfen Sie die Einlage nicht übermäßig voll und lassen Sie kein Material in bewegliche Bereiche ragen.
Wenn nach der genehmigten Inspektion weiterhin ein rotes Licht leuchtet, gehen Sie nicht davon aus, dass der Behälter die einzige Ursache war. Der aktuelle AutoScooper 12-Leitfaden besagt, dass ein blinkendes oder dauerhaft rotes Licht entweder auf einen vollen Abfallbehälter oder einen ausgelösten Sicherheitssensor hinweisen kann.
Schritt 6: Streuart und Füllstand prüfen
Zu viel Streu kann die Last erhöhen oder in Bereiche gelangen, in die sie nicht gehört. Zu wenig Streu kann schwache Klumpen oder eine schlechte Trennung verursachen. Ein inkompatibles Material kann durch ein Sieb gelangen, zerbröckeln, verschmieren oder die Bewegung stören.
Für den AutoScooper 12 spezifiziert die aktuell veröffentlichte Anleitung:
- kleinstückige klumpende Mineral- oder Bentonitstreu;
- Streu zwischen den MIN- und MAX-Linien;
- keine Tofu-Streu in langen Streifen;
- keine Kristallstreu;
- Verwendung der „Litter Added“-Funktion (Streu hinzugefügt) nach dem Hinzufügen von Streu, wie im Leitfaden beschrieben.
Diese Anweisungen sind spezifisch für den AutoScooper 12. Verwenden Sie für den AutoScooper 11 das mit diesem Modell gelieferte Handbuch oder holen Sie die aktuellen Anweisungen beim Support ein. Kopieren Sie keine Streuregel von einem Modell auf das andere.
Wenn das Problem nach dem Wechsel der Streu begann, kehren Sie erst zu einer bestätigten kompatiblen Art zurück, nachdem Sie das ungeeignete Material gemäß den Reinigungsanweisungen entfernt haben. Mischen Sie keine zufälligen Streusorten, um zu versuchen, den Mechanismus zu bewegen.
Schritt 7: Sichtbare Sensor- und Bewegungsbereiche inspizieren
Streustaub, ein Rand der Einlage oder ein loser Klumpen können einen sichtbaren Sensor- oder Bewegungsbereich beeinträchtigen. Verwenden Sie nur die Zugangs- und Reinigungsmethode, die vom aktuellen Leitfaden erlaubt ist.
Sichere Inspektion bedeutet:
- die Stromversorgung ist bei Reinigung oder Wartung unterbrochen;
- die Katze ist vom Gerät entfernt;
- nur sichtbare, für den Besitzer zugängliche Bereiche werden inspiziert;
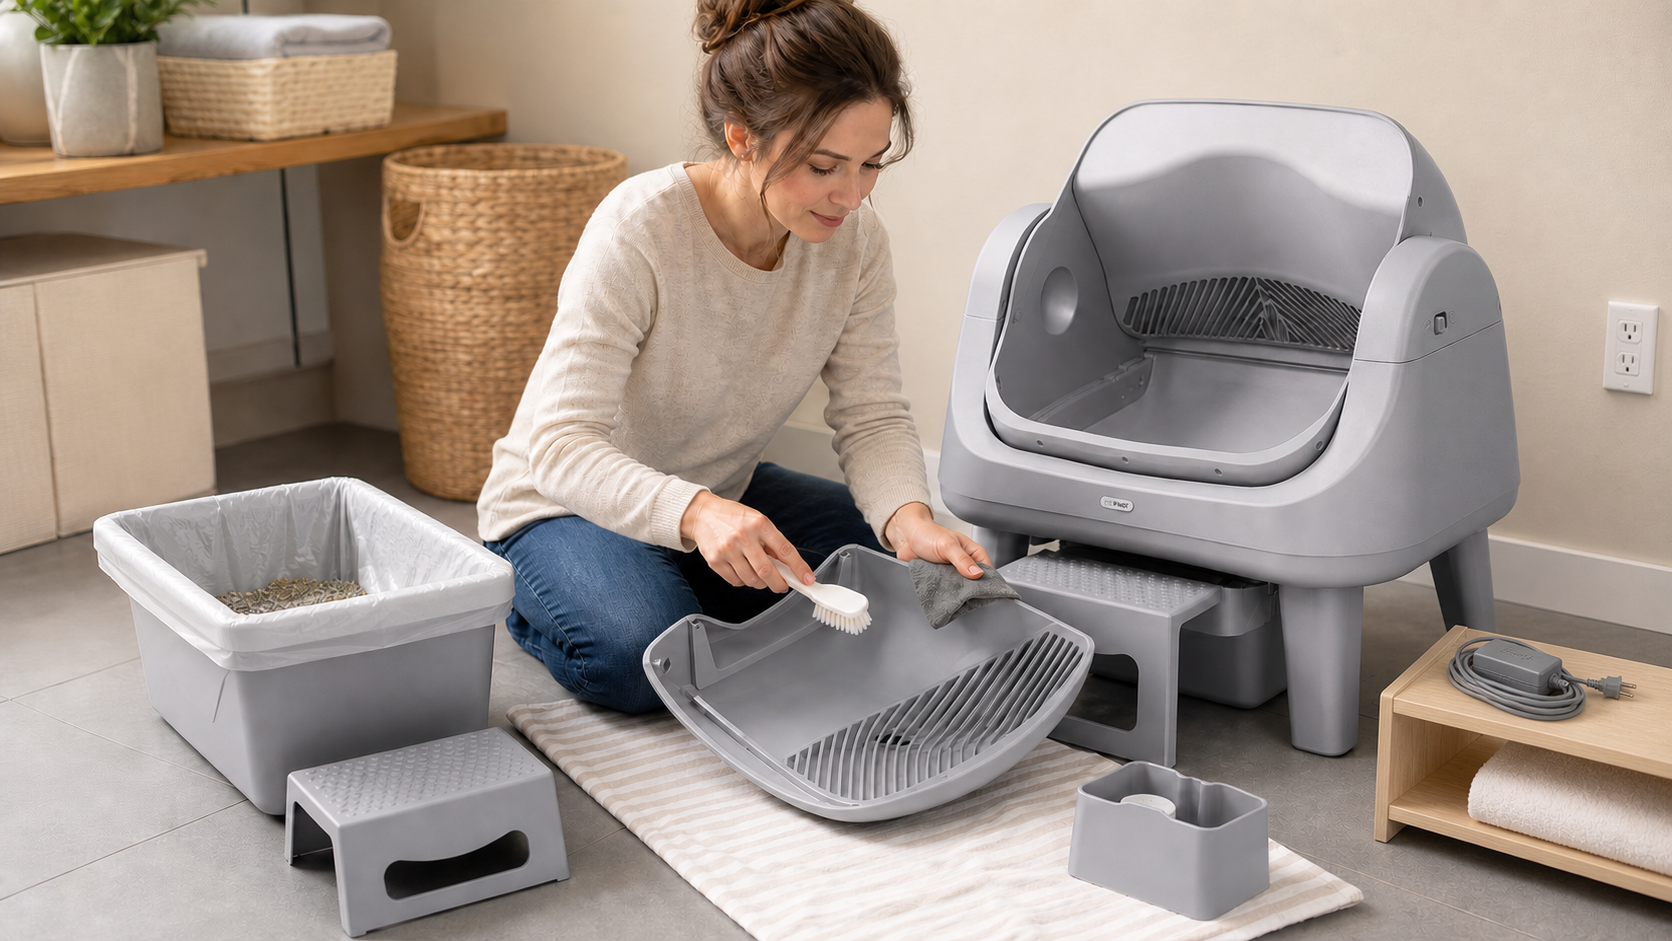
- loses trockenes Streu wird mit einer weichen Bürste oder einem trockenen Tuch entfernt;
- kein Sensor wird abgekratzt, besprüht, abgedeckt oder gedrückt;
- gewaschene abnehmbare Teile sind vor dem Wiederzusammenbau vollständig trocken.
Wenn sich ein Hindernis in einem versiegelten oder elektrischen Bereich befindet, stoppen Sie. Dies ist ein Fall für den Support, keine Aufforderung, die Basis auseinanderzubauen.
Symptom-Leitfaden
Der AutoScooper hat Strom, startet aber keinen Reinigungszyklus
Stellen Sie sicher, dass die Ausrichtung beim Start abgeschlossen ist, sich das Gerät im gewünschten Modus befindet und sich keine Katze oder kein sich bewegendes Objekt in der Nähe des Sensorbereichs befindet. Prüfen Sie Abfallbehälter, Einlage, Streufüllstand und sichtbare Sensorbereiche. Versuchen Sie dann nur den manuellen Zyklus, der für das Modell beschrieben ist.
Wenn die Steuerung nicht reagiert, notieren Sie die Anzeige und kontaktieren Sie den Support. Wiederholtes Drücken von Tasten kann unklar machen, welcher Modus aktiv ist.
Der Zyklus startet und pausiert dann
Eine Pause kann eine normale Reaktion auf eine erkannte Anwesenheit oder Bewegung sein. Entfernen Sie Personen, Haustiere und bewegliche Objekte aus dem unmittelbaren Bereich und lassen Sie die dokumentierte Bedingung klären. Decken Sie den Sensor nicht ab, um das Fortsetzen des Zyklus zu erzwingen.
Wenn der Zyklus in einem leeren Bereich pausiert, prüfen Sie auf einen Rand der Einlage, loses Streu oder ein sichtbares Hindernis. Eine wiederkehrende unerklärliche Pause sollte per Video dokumentiert werden.
Die Trommel scheint festzustecken oder falsch ausgerichtet zu sein
Drehen Sie sie nicht von Hand oder ziehen Sie nicht gegen den Motor. Schalten Sie das Gerät gemäß Leitfaden aus, halten Sie die Katze fern und prüfen Sie nur auf ein deutlich sichtbares loses Objekt in einem für den Besitzer zugänglichen Bereich. Fotografieren Sie die Trommelposition und kontaktieren Sie den Support vor einer weiteren Inbetriebnahme.
Das Licht ist rot
Im aktuellen AutoScooper 12-Webleitfaden bedeutet ein blinkendes oder dauerhaft rotes Licht, dass der Abfallbehälter voll ist oder ein Sicherheitssensor ausgelöst wurde. Inspizieren Sie den Behälter, die Einlage und die sichtbaren Sensorbereiche. Da der Leitfaden keine vollständige Tabelle der Blinkcodes veröffentlicht, nehmen Sie keine spezifischere Diagnose allein aufgrund der Farbe vor.
Der Zyklus schließt ab, aber Abfall bleibt zurück
Dies ist oft ein Trennungsproblem und kein Motorproblem. Prüfen Sie:
- kompatible Klumpstreu;
- Streufüllstand zwischen den Fülllinien;
- genügend Zeit zur Bildung eines festen Klumpens;
- klebrige Rückstände auf genehmigten waschbaren Teilen;
- zerbrochene Klumpen oder ungewöhnlich weichen Stuhl;
- die Abfallöffnung auf sichtbares loses Material.
Kürzen Sie die dokumentierte Klumpzeit nicht und fügen Sie nicht zu viel Streu hinzu. Anhaltender weicher Stuhl, Durchfall oder eine neue Veränderung beim Ausscheidungsverhalten gehört zum Tierarzt, nicht zur Maschinenjustierung.
Das Gerät wurde laut
Stoppen und vergleichen Sie das Geräusch mit dem Normalbetrieb. Suchen Sie nach einem instabilen Boden, einem losen Außenteil, Streu in einer sichtbaren Schiene oder einem überfüllten Abfallbereich. Mahlen, wiederholter Aufprall oder ein neuer elektrischer Geruch erfordern den Support vor der weiteren Verwendung.
Ein kontrollierter Test nach grundlegenden Prüfungen
Führen Sie einen Test nur durch, wenn das Gerät korrekt zusammengebaut, trocken, frei von Hindernissen und die Katze sicher entfernt ist. Verwenden Sie einmal die im Handbuch dokumentierte manuelle Reinigung. Beobachten Sie von außerhalb des beweglichen Bereichs.
Zeichnen Sie auf, ob:
- der Befehl angenommen wird;
- die Trommel in der erwarteten Richtung beginnt;
- eine Pause an der gleichen Position auftritt;
- sich eine Anzeige ändert;
- die Abfallöffnung sich leert;
- die Trommel in ihre normale Ausgangsposition zurückkehrt.
Ein kontrollierter Test ist nützlicher als viele schnelle Neustarts.
Wann man den PetPivot-Support kontaktieren sollte
Kontaktieren Sie den Support, wenn die Trommel nicht in die normale Ausrichtung zurückkehren kann, eine Warnung nach den genehmigten Prüfungen bestehen bleibt, eine Sensorreaktion ungewiss ist, das Gerät neue mahlende oder aufprallende Geräusche von sich gibt, der Adapter beschädigt ist, Flüssigkeit in die elektrische Basis gelangt ist oder das Problem erneut auftritt.
Verwenden Sie die PetPivot FAQ und kontaktieren Sie `support@petpivot.com`. Fügen Sie Modell, Bestellnummer, Anzeigestatus, kurzes Video, Streuart und die bereits durchgeführten Prüfungen bei. Versenden oder senden Sie keine benutzte Katzentoilette zurück, bevor Sie die aktuellen Rücksendeanweisungen erhalten haben.
|
|
|


Offizielle PetPivot Produktbilder. Bestätigen Sie die aktuelle Produktseite und den Modellleitfaden vor der Veröffentlichung.

Fügen Sie modellspezifische Nachweise bei und verwenden Sie kein Gerät mehr, das physisch beschädigt oder unsicher erscheint.
Wiederholte Unterbrechungen verhindern
- Halten Sie die Streu im dokumentierten Füllbereich.
- Verwenden Sie nur eine bestätigte kompatible Streu.
- Entleeren Sie den Abfallbehälter, bevor er überläuft.
- Halten Sie die Einlage unterhalb sichtbarer Sensorbereiche.
- Reinigen Sie genehmigte Teile planmäßig und trocknen Sie sie vollständig.
- Halten Sie das Gerät eben und den Servicebereich frei.
- Prüfen Sie den Zusammenbau nach jeder gründlichen Reinigung erneut.
- Speichern Sie das aktuelle Handbuch und den Support-Kontakt.
Für modellspezifischen Betrieb kehren Sie zum PetPivot AutoScooper-Benutzerleitfaden zurück. Für Ersatzverbrauchsmaterialien und genehmigte Teile überprüfen Sie das PetPivot Zubehör.
Häufig gestellte Fragen
Warum startet mein AutoScooper keinen Zyklus, nachdem ich die Schublade geleert habe?
Die Schublade mag leer sein, während das Gerät noch einen Sitz-, Einlagen-, Füllstand- oder Anwesenheitsstatus erkennt. Prüfen Sie nur vom Besitzer zugängliche Punkte in einer sicheren Reihenfolge.
- Halten Sie die Katze fern und stellen Sie sicher, dass das Gerät die Ausrichtung beim Start abgeschlossen hat.
- Setzen Sie die leere Schublade wieder ein und bringen Sie die Einlage genau wie im aktuellen Modellleitfaden beschrieben an.
- Prüfen Sie, ob die Streu kompatibel ist, eben liegt und im dokumentierten Füllbereich ist.
- Entfernen Sie Personen, Haustiere und bewegliche Objekte aus dem Sensorbereich und versuchen Sie dann nur den genehmigten manuellen Zyklus.
Warum leuchtet das rote Licht noch, wenn der Abfallbehälter nicht voll ist?
Auf dem aktuellen AutoScooper 12-Webleitfaden kann ein rotes Licht auch auf einen ausgelösten Sicherheitssensor hinweisen. Eine schlecht sitzende Schublade, eine Einlage, die einen Sensorbereich kreuzt, oder Bewegungen in der Nähe können daher von Bedeutung sein, selbst wenn noch Kapazität verfügbar ist.
Was sollte ich tun, wenn Streu an der Trommel oder am Sieb festklebt?
Schalten Sie das Gerät gemäß Leitfaden aus und entfernen Sie nur loses Material, das deutlich sichtbar und für den Besitzer zugänglich ist.
- Drehen Sie die Trommel nicht von Hand.
- Führen Sie keine Werkzeuge in geschützte Öffnungen ein.
- Tragen Sie keine Flüssigkeit auf die elektrische Basis oder geschützte Sensorbereiche auf.
- Fotografieren Sie wiederholtes Festkleben und kontaktieren Sie den Support, wenn normale Trockenreinigung dies nicht löst.
Soll ich weiter auf Reset drücken oder eine festsitzende Trommel erzwingen?
Nein. Wiederholte Befehle können die Sequenz verbergen, die den Fehler verursacht hat, und das Erzwingen der Trommel kann den Mechanismus beschädigen. Stoppen Sie nach den dokumentierten Prüfungen und bewahren Sie das Anzeigemuster für den Support auf.
Welche Informationen sollte ich dem PetPivot-Support senden?
Senden Sie genügend Beweise, damit das Problem reproduziert werden kann, ohne unsichere Tests zu wiederholen.
- Exaktes Modell, Bestellnummer und Serieninformationen, falls verfügbar.
- Anzeigefarbe und ob sie leuchtet, blinkt oder von einem Ton begleitet wird.
- Streuart, Füllstand und kürzliche Einrichtungs- oder Reinigungsänderungen.
- Ein kurzes Video, das die Position von Trommel, Schublade und Anzeige zeigt.
- Die sicheren Prüfungen, die bereits durchgeführt wurden, und was nach jeder einzelnen passiert ist.
Internes Link-Verzeichnis
|
Ankertext |
Ziel-URL |
Platzierung |
|
https://petpivot.com/collections/auto-scooper |
Kontextbezogene Produktfindung oder abschließender CTA |
|
|
https://petpivot.com/products/litter-box |
Modellspezifischer Produktverweis |
|
|
https://petpivot.com/products/autoscooper-12-lite-cat-litter-box |
Modellspezifischer Produktverweis |
|
|
https://petpivot.com/pages/user-guide |
Anweisungen zu Einrichtung, Betrieb, Reinigung und Sicherheit |
|
|
https://petpivot.com/pages/faq |
Support- und allgemeine Fragen |
Quellen und Nachweise
- PetPivot AutoScooper Bedienungsanleitung - Aktuelle Einrichtung, Streu, Umgewöhnung, Wartung, Indikatoren und Betriebsgrenzen des AutoScooper 12.
- PetPivot AutoScooper 11 Produktseite - Offizielle Produktseite und originales Produktbild.
- PetPivot AutoScooper 12 Lite Produktseite - Offizielle Produktseite und originales Produktbild.
You may also like


AutoScooper 11 Katzentoiletten-Einsatz – 2er-Pack

AutoScooper 11 Kotbeutel – 60 Stück


AutoScooper 12 Lite Katzentoilette

AutoScooper 12 Lite Katzentoilette
Further reading
Wie oft sollte eine automatische Katzentoilette gereinigt werden?
So gewöhnen Sie Ihre Katze stressfrei an eine automatische Katzentoilette
Die Katze benutzt die automatische Katzentoilette nicht? Nutzen Sie diesen Plan zur Eingewöhnung